When subscribing or renewing your subscription, you can receive a discount if you invite a friend!!
You will receive a discount equivalent to 50% of the value of your friends subscriptions. Here is a table of some common cases
Friends
Subscription
Value
You get
1
1 year
USD$12,99
USD$6,99 discount
2
1 year
USD$12,99 * 2
USD$12,99 discount
1
2 year
USD$22,99
USD$12,99 discount
2
2 year
USD$22,99 * 2
USD$22,99 discount
1
Lifetime
USD$72,99
USD$36,99 discount
2
Lifetime
USD$72,99 * 2
USD$72,99 discount
As you can see, if you invite two friends you can get a free subscription!
Note that the discount is applied as a refund of your purchase, so for example if you have a USD$22,99 discount you can use it only for a free 2 year subscription or as a discount for a Lifetime subscription.
How to proceed? Renew or purchase your subscriptions as always, then write to support@retrox.tv with your activation code and the activation codes of your friends. Then we will proceed with a refund on your purchase. Note that this should be done as soon as possible for us to be able to make the refund, which is within a week.
Now, if you purchased a subscription recently and you were not aware of this discount, you can write to support@retrox.tv anyways to check if we can do the discount for your specific case.
How to install RetroX on your Android TV device
RetroX is not available on the Play Store, while this is not a problem on mobile devices because you just download the RetroX.apk file and open it to install it on your phone, on Android TV devices this will require some additional work.
The basic steps are:
Install a file browser on your Android TV device
Transfer the RetroX.apk file to your Android TV device
Open RetroX.apk with the file browser to install it on your Android TV device
Open Files on your phone, go to the Downloads folder and select the RetroX.apk file. Use the share option to share the file with Send files to TV
The RetroX.apk file will be transferred from your phone to your Android TV device
Step 3: Install RetroX.apk
Use X-Plore that you installed on Step 1 to open the RetroX.apk file that is now stored on your Android TV device.
The system will ask you for install permissions, you need to grant them so X-Plore can install the RetroX.apk file
If you know a better method to install RetroX, or you have some corrections for this tutorial, please write to support@retrox.tv and let us know
Supported Systems
Right now RetroX supports 33 systems:
Atari 2600
Atari 5200
Atari 7800
Atari 800 (XL/XE)
Atari ST
Atari Lynx
Atari Jaguar
Commodore 64
Commodore Amiga
Final Burn Neo
GameBoy
GameBoy Color
GameBoy Advance
MAME
MSX (1, 2, 2+, TurboR)
Neo Geo Pocket Color
Nintendo Entertainment System (NES)
Super Nintendo (SNES)
Nintendo 64
Panasonic 3DO
PC MS-DOS
PC Engine / TurboGrafx 16
PlayStation 1
PlayStation Portable (PSP)
ScummVM
Sega Master System
Sega Game Gear
Sega Genesis
Sega 32X
Sega CD
Sega Saturn
Sega Dreamcast
ZX Spectrum
Automatic controller mapping troubleshoot
RetroX will try to use your controller without any kind of configuration following the standard button mappings for Android. If you start a game with your controller RetroX will use that controller for the game. Inside the game if you press any of the A/B/X/Y/START/SELECT buttons that controller will be assigned to Player 1 and you will see a message on the screen. If other players want to join, they only need to press one of those buttons in their controllers.
If your controller doesn’t work or you are seeing onscreen controllers in games, follow these recommendations to fix it.
RetroX will use an autodetection mode for displaying onscreen controllers by default, if you start a game with a real controller the onscreen ones will be hid, otherwise they will be shown on the screen. If you always use a real controller you can turn this setting to “off”, so RetroX will never try to autodetect if you are using a controller or not. This is under System Settings -> Gamepads
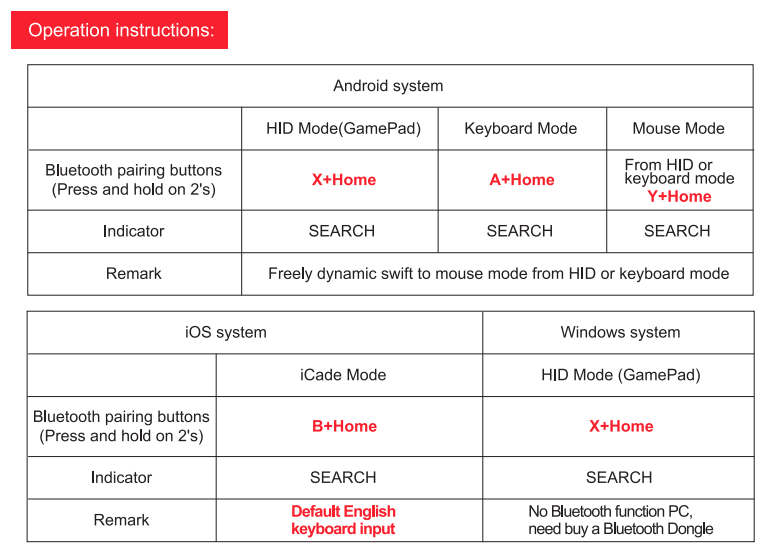
If your controller doesn’t work with RetroX first make sure that your Android device is working with it. If you can’t navigate your device with your controller outside RetroX then your controller will not work with RetroX either. If that is the case, make sure that you pair your device with an Android compatible mode. Many controllers support multiple modes of operation (iCade, iOS, etc) and they include an Android mode. The operation mode is typically set pressing the pairing button together with one of the A/B/X/Y buttons, but always check your manual for the instructions specific for your device.
Now, if your controller still doesn’t work, check that it is sending the right events when pressing the buttons. Open Diagnostics -> Gamepad codes and press the DPAD and/or the A/B/X/Y buttons, they must show something like DPAD_LEFT, DPAD_RIGHT, BUTTON_A, BUTTON_X and so on while you press them. If nothing is shown, then your controller is still not communicating with your Android device. If you see different codes like BUTTON_1, BUTTON_2, etc, you must map your controller manually.
Mapping is a way to tell RetroX how to translate your non-standard buttons to standard buttons. Open Gamepads -> Mapping and you will see a controller on the screen. If you press any button (except the DPAD) the matching button on the screen will highlight, if none does highlight then use the DPAD to move around the buttons on the screen and highlight the one that doesn’t work. Once highlighted, press the corresponding button on your controller, that will tell RetroX that the button that you pressed will be translated to the button highlighted on your screen. Once done, press the Save button on the screen.
Here you can see a video doing the mapping
If you still need help, write us a word to support at retrox.tv with screenshots of the Diagnostics -> Gamepad screen while pressing the DPAD and any of the A/B/X/Y buttons
Internal Roadmap for RetroX 3
If you are reading this post is because you are considered a friend or part of the RetroX team, please consider that this document is private only and it must not be shared. This is just for YOU.
Following is an internal roadmap for changes on RetroX that will be done in the next 4-6 months targeting RetroX 3. These changes will be worked in parallel with those listed in the public roadmap but these RetroX 3 ones have a higher priority.
This document is a way to write down the ideas that I’ve been working on before turning them into code, also this is a kind of set of notes for me and a base for discussion with many of you without having to go explaining one for one.
Just to make it clear from the start, these are mostly changes that improve RetroX, there are no planned changes in the current pricing and subscriptions model.
Why these changes? I’ve always have tried to make RetroX stand over other Android emulation front ends with it’s ease of use and (still) unique features. Many people have acknowledged that and have given their support throughout all these years, but new apps and hardware are always adding more offerings to the RetroX target users and I want to keep RetroX ahead of all possible competitors. I’m taking in account that some of them already have a strong user base on other systems like is the case of Launchbox, and others have the potencial of bringing exciting ingredients to the mix like Polymega. Not to mention the plethora of “mini” retro consoles appearing all the time.
Having this scenario, it’s not just a matter of adding new emulators, currently RetroX supports 27 emulators and adding one more is typically something that doesn’t produce much changes for most users. I’m not saying that I won’t be adding more, but I don’t see it as a priority now as I saw it in the past. Currently those efforts are better used to fix or update currently used emulators like N64, PSP and Dreamcast.
RetroX is designed to be used by only one person, but given that many people are using RetroX in a shared TV setup or they share their account with their family devices I see a need for Netflix style profile users. By default the app will use one hidden profile just like it is now, but you will be able to create more profiles for users to select at launch so each one can save their own favorites, cloud saves and other info that may be associated to the user account. This will allow for a more interesting feature: Child profiles.
Child profiles
There is no doubt that children enjoy retrogames, but for obvious reasons they don’t have the criteria to look for games if they have to select a system first, also some still don’t know how to read/write to find a game and they shouldn’t be exposed to violent or non-appropiate content given their age.
A Child profile will switch to a simplified user interface designed for children, and the account owners will have the tools to filter the content so their children only find the games that are considered appropiate for them.
Better aspect ratio options
Currently there are two aspect ratio options: stretch to fill the screen and “original”. Original seemed like a good thing because it uses a 1:1 pixel aspect ratio, but many systems didn’t have squared pixels and they are displayed wrong with that mode. For example NES games currently look narrower than the expected 4:3 aspect ratio, and other games like Street Fighter II in some MAME versions looks wider than again, 4:3 aspect ratio.
The Analog mini consoles provide interesting aspect ratio modes to fit the user preferences better. Some of those aspect ratio options are currently implemented in some emulators but not being used by RetroX. The target will be to bring those aspect ratio options to RetroX to allow real 4:3 mode and integral scaling to avoid artifacts.
Now, adding these options will bring complexity, but RetroX will use the best defaults for each system by default.
To better understand the issue and the opportunities with aspect ratio options, here is a video (options start at 8:20)
More background options
Right now RetroX offers black or live backgrounds. Live backgrounds use the current frame data to paint a blurred image using that frame as the background, it gives a sense of full-screeness but it requires more resources and it may seem annoying to many people, that’s why it is turned off by default.
Live backgrounds will be improved by adding a border around the game image, but two additional background options will be added:
Static images: The user will be able to select a static image to be used as a background among a set of images provided by RetroX. Those images will be included with the app and/or will be hosted online like it is being already done with themes. Also the user will be able to throw their own background images under retrox.data/backgrounds. This method can be seen in consoles like the new Sega Genesis Mini and it looks really great.
Bezels project: The Bezels project is a big database of backgrounds and artwork for specific games. As it is being done with the cheats database today, RetroX will allow the user to enable the Bezels project to bring the artwork automatically with minimum or no configuration by the user.
UPDATE: Improved live borders and Static images was released as v2.9.2
UPDATE: Bezels projec was released as v2.9.24
EmuMovies integration
RetroX downloads the artwork for each game automatically, but now that video snapshots have been added it requires more work from the users to have “the full experience” in their setups.
I’ve been talking to the EmuMovies people so they can give me access to sync the users content with their artwork database like many other frontends currently do. Once done, EmuMovies users will be able to bring their artwork directly into their devices automatically.
UPDATE: This was released as v2.8.2
Automatic gamepad mappings
When RetroX started there were no standard gamepad buttons for Android and the user needed to teach RetroX how their controller buttons worked. Not anymore. In the last years the controller buttons have been standardised a lot so now it is safer to assume certain button layout.
RetroX will assume that the gamepad that starts the game is Gamepad 1, and if an event from a new gamepad is received it will be considered to be Gamepad 2, then 3, etc. It is something that RetroArch currently does, only that because of the Android controller chaos from the past it would have been very risky for RetroX to do it that way.
The user still will be able to map the buttons, but that will be optional only. Also the mapping will be associated to the gamepad brand/model and not the plugged gamepad like it is now.
All mapping info will be stored with the user account, so once a gamepad is mapped there will not be any need to map it again. Never.
UPDATE: This was released as v2.9.0
Theme Styles
Currently Themes mode supports only Emulation Station style themes, but that’s only the beginning. New theme styles will be added to support other interesting types of layouts and user experience. Of course this will be used for having features such as children profiles.
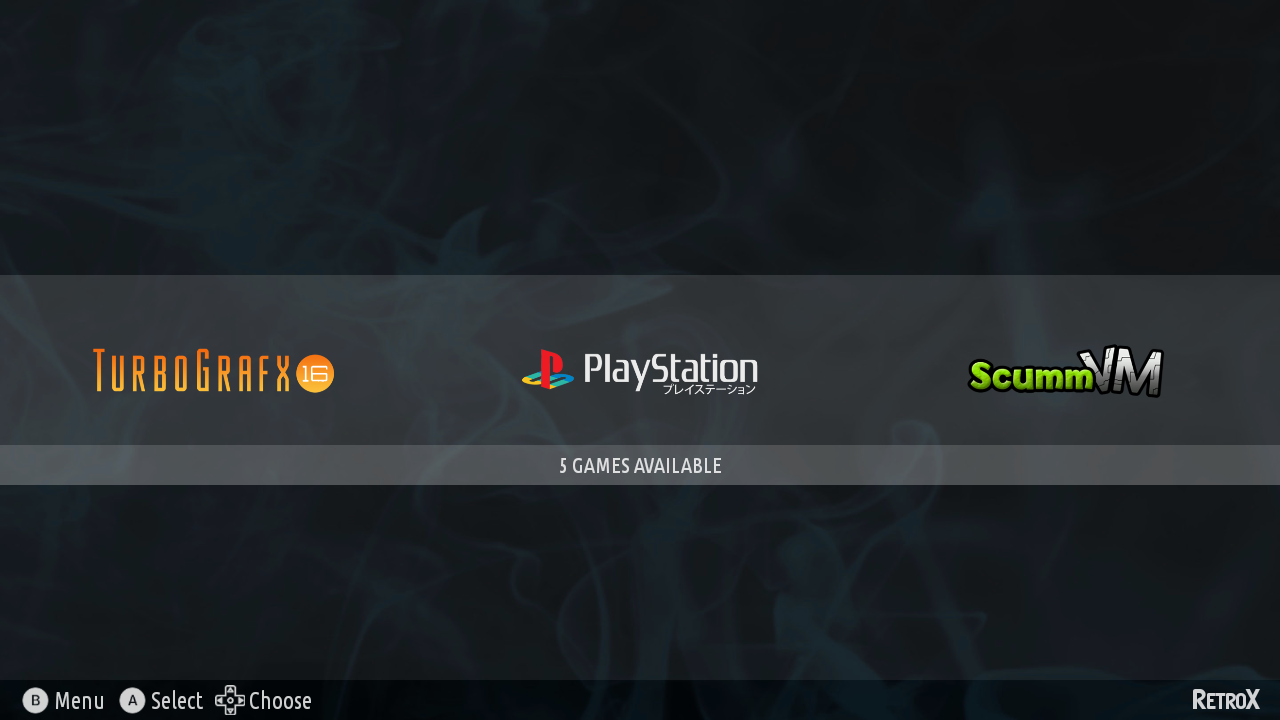
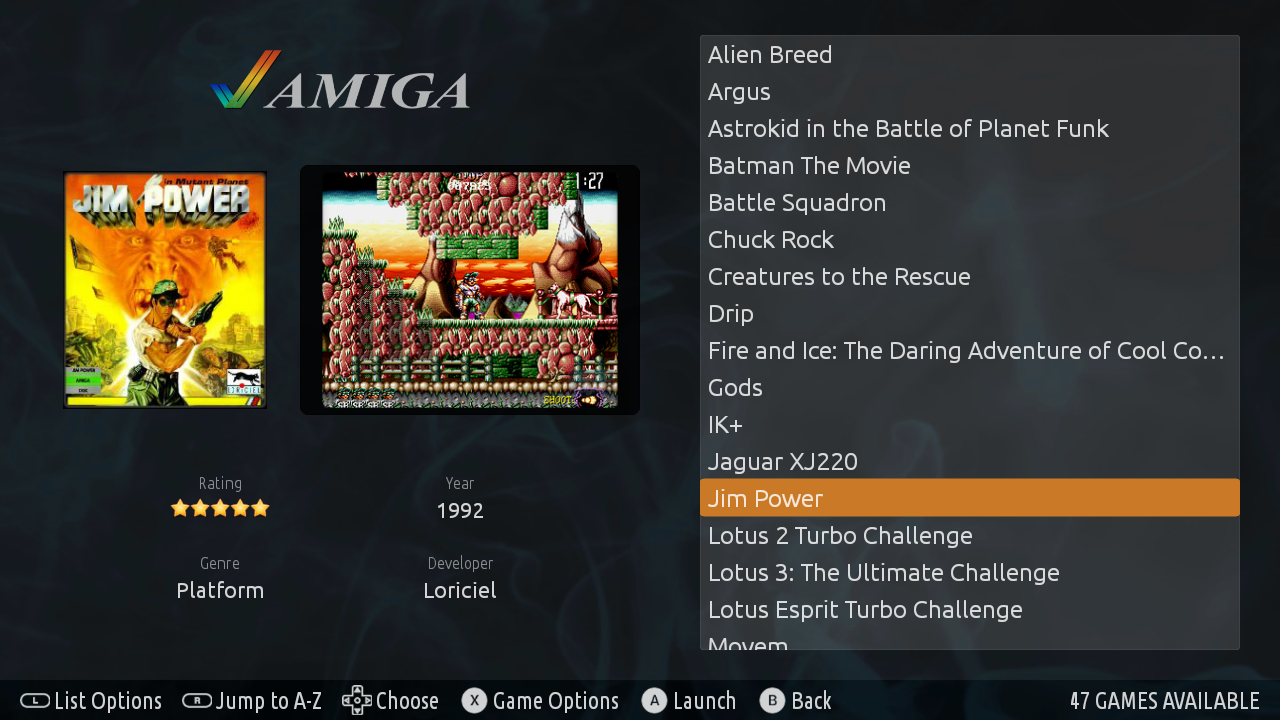
Which exactly is a theme style? It defines behaviour and graphics elements, for example an ES style theme has two screens: a system selector screen and a game selector screen, and each of those have different graphics elements or widgets like lists, texts, shots, etc. A new theme style may bring a new game selector like a coverflow type of selector or a card selector like the one used in TV mode, etc. Also a new theme style may have no system selector at the front (for children), a separate search screen and more.
Hopefully although not mandatory, legacy user interface modes like TV and Mobile will be turned into Theme styles so a big chunk of code might be removed making the codebase more easy to maintain.
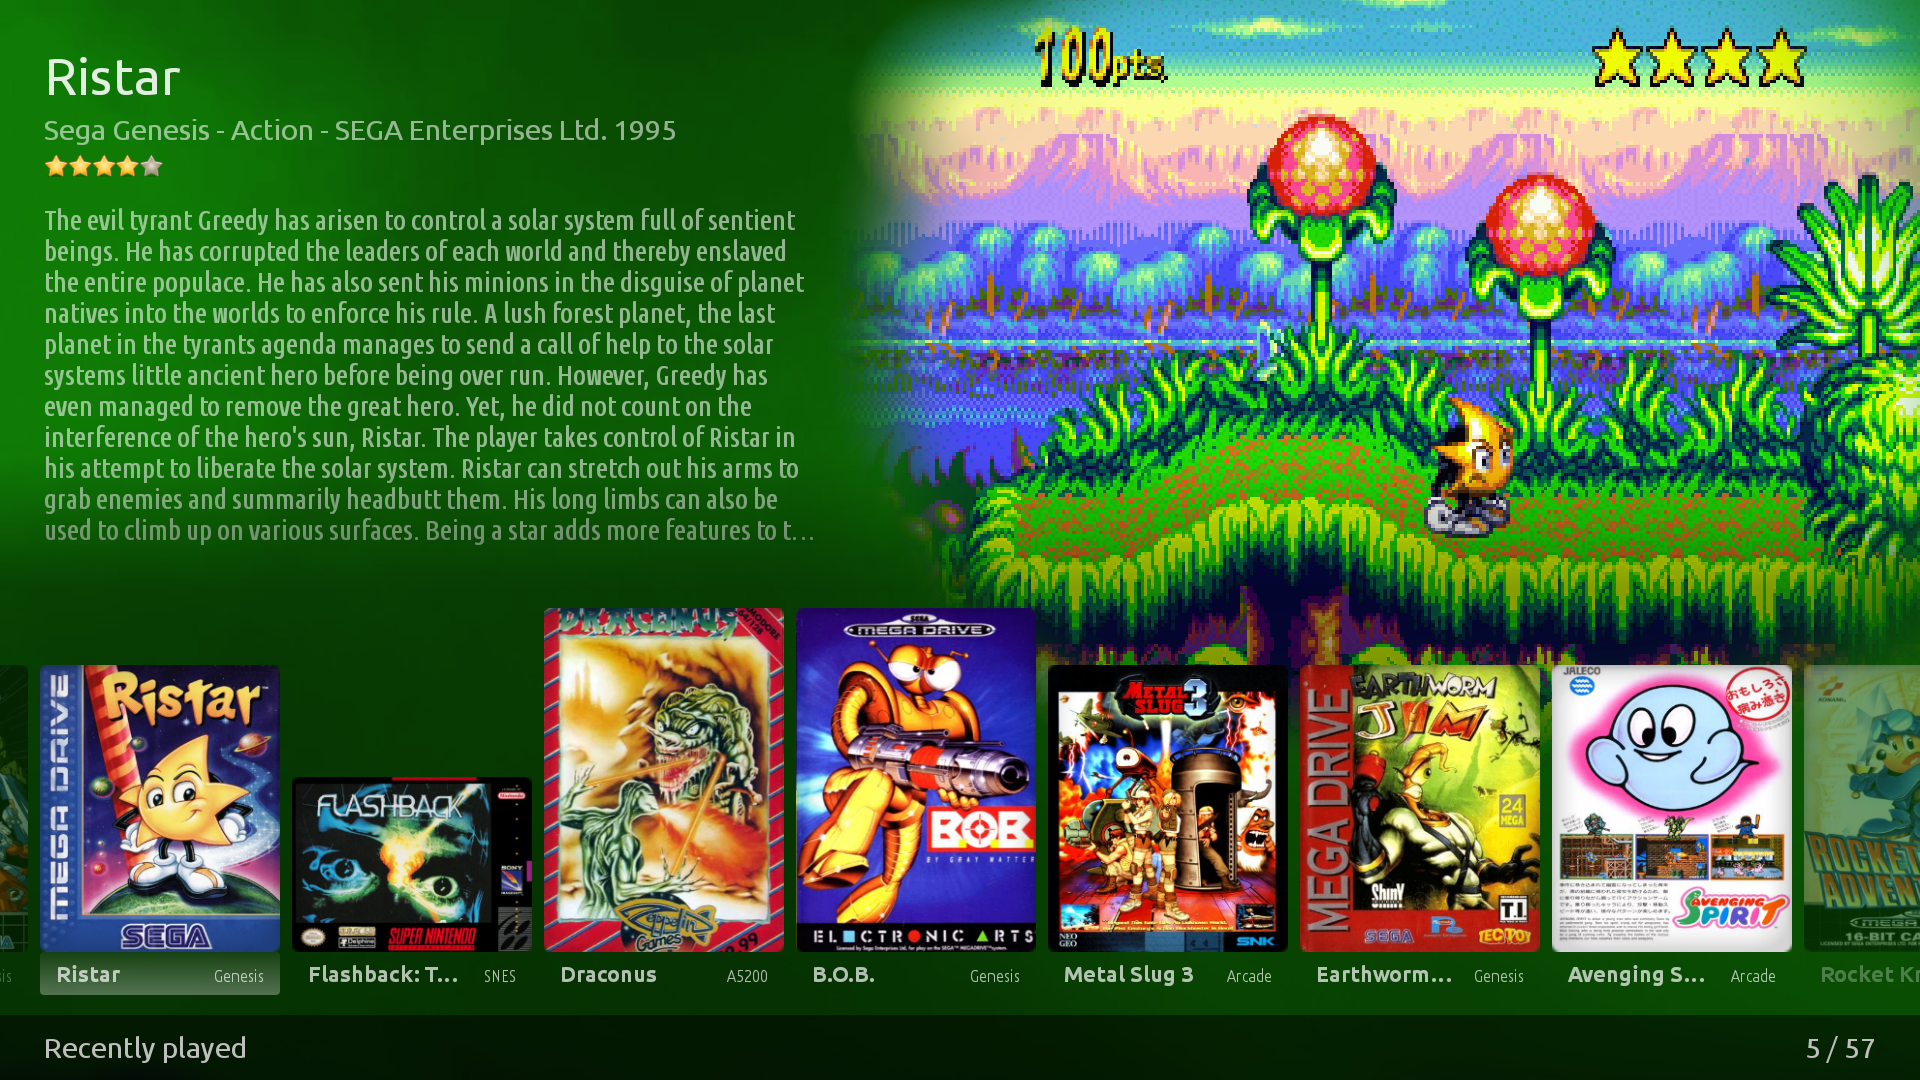
Just as a tease, look at these possible theme styles:
Some systems have better emulation using closed source emulators that cannot be integrated with RetroX (3DO, Jaguar, Dreamcast). Some people want to use these emulators but still manage their game collections inside RetroX, so they will be able to launch a game using those emulators.
This feature will be tagged as “not supported emulator” and the users will need to set them up themselves.
Although it may work bad because of the lack of integration, this is the only experience that other frontend users have been used to.
Better content sources
Currently users can add content just copying the files to their devices or adding SD Cards / USB drives, also they can add games using cloud storage services and local networks through NAS or Windows computers. Cloud storage has the speed and size restrictions, and NAS has been always troublesome because of the protocols involved even when some people have managed to make it work for them.
That will be improved through two methods:
The user will be able to install a small program (RetroX Server) in their computers to share a folder with their Android devices. Just pick the folder and your Android devices connected to the same local network will be able to add games from that folder, be it by demand (once the user selects the game) or by transferring all the games to the device so they just can sync once and then just disconnect from that network.
Private cloud services will be added: OwnCloud, NextCloud and Tonido
New emulation system that replaces RetroArch
Currently RetroX uses several emulators, but RetroArch is the one that supports most systems and it is wildly evolving. Now, that could be a good thing but at the same time that is a bad thing. RetroArch is becoming bigger and bigger and not only it has to support a wide variety of hosts systems (PSP, PS3, washing machines, toasters…) but also sometimes they add corner features that lie outside the scope of the common RetroX user just adding complexity to the code base. Having said that, the main problem is that depending on third parties is always a risk and it is time to make a jump.
RetroArch is not an emulator in itself, rather it is something like a shell for emulators that implements the open libretro specification (made by themselves), so in theory those emulators can run under a different shell with different design goals… like RetroX. For example, in RetroArch there are two user interfaces (legacy and Lakka) and neither of those are designed to be easy to use, but to be powerful (even I struggle trying to use it!), also needed features like having an Android TV compatible keyboard seems to be quite low in their priorities compared with other more demanded features like… adding text to speech.
So I’ll be creating a RetroX shell for libretro for better overall integration. For example today I feel that the in-game menu in RetroX + RetroArch is like having another app opened instead of something that is running inside RetroArch, and features like instant shader or aspect ratio switch would be almost impossible to do with the current approach.
Having that shell for RetroX will allow me to port computer based emulators to libretro together with the Android TV keymapping, so I will be able to drop those old SDL based emulators that have been having problems on every Android update like DOS, Atari800 and Amiga, replacing them with libretro based ones.
Also having that librero shell will make it A LOT easier to bring the next change…
RetroX for Computers
Yes! The time has arrived, RetroX will be ported to computer based systems: Linux, Mac and Windows, in that order. Why Windows last? Because they already have Launchbox!
After the codebase was reworked to implement Themes, RetroX took a certain amount of distance with Android and a second iteration on that separation together with the RetroX shell for libretro will allow to bring RetroX to computer based systems.
This is like what Launchbox is doing but the opposite bringing their PC app to Android, with an additional twist: Having RetroX for Linux will open the doors to use a lot of interesting and powerful Single Board Computers that have been appearing in the market, like the Raspberry Pi, Atomic Pi, LattePanda. Just have a watch to ETA Prime and Explaining Computers channels to see in what amazing devices RetroX will be running. I personally have preserved my RetroFlag cases for this moment.
I know, RetroX today runs on Raspberry Pi using Frambu, but it still Android based and even for me Android over the Pi seems to take ages to boot.
No additional licenses or fees will be required to run RetroX on these devices, a standard RetroX subscription will allow any user to run RetroX in their preferred devices, being Android or Linux/Mac/Windows based.
Other smaller but needed changes
Easier login. Users that can’t use their Google accounts to log in will be able to log in just giving their email addresses so they can authorize their devices just clicking a link in their email accounts.
Easier account activation. Similar to the above, users will be able to activate their accounts without using Activation Codes
Shaders will be allowed to be changed with the game running. Also they will be able to be set as global, per system or per game.
Palettes: Switch palettes for certain systems like NES. Currently Gameboy supports palletes in RetroX
Emulator changes or updates for better performance / compatibility: N64, PSP, Dreamcast
Themes 4 Noobs help
The recent Themes 4 Noobs update came after the Nvidia Shield Experience 8.0 update which broke a lot of apps. After a few days we have found temporary solutions for these problems and created this post to help. Also we have included some common questions that we have received these days.
Parsing error while trying to install the update or AddOns
UPDATE: This was fixed on the “New Deal” update. Because the older versions still have this problem, the update may throw this error. If that is the case, just download RetroX again and install it over (without uninstalling)
We still don’t know the exact cause, but if you have this problem and have technical skills you can help us find the root cause of this problem through your log files. It will be greatly appreciated.
Follow these steps to fix it:
In your Shield open Apps -> RetroX and use the Delete Cache option. Then try again
If that didn’t fix your problem, open Apps again and uninstall RetroX. Then open Apps -> System Apps and uninstall all the RetroX related AddOns. Once everything RetroX related is uninstalled, install RetroX again from our download page. As soon as you start opening games, the AddOns will be installed again.
Weird things happen when pressing some buttons in my controller
Use the Gamepad Mapping option to remap your controller
I press the “Download” but it doesn’t do anything
Same as above, use the Gamepad Mapping option to remap your controller or try with your remote
I reinstalled RetroX and now my account is in free trial
You need to use your activated user account. If you use a different account, RetroX will take it as a new free trial account.
This is a very common problem, don’t assume that your Paypal or Amazon account is your activated account, because once the Activation Code is purchased you can use it with any account, and RetroX will activate the account that you are logged in the app.
Although RetroX shows you which account will be activated, many people forget it later. A good way to know which is your current account is to log in with your possible account in our User Login page.
Note that once you activate an account, the Activation Code is void and no longer needed.
I don’t have or don’t remember my password
Go to the User Login page and use the “remember my password” option. A link will be sent to your email to set a new password.
Artwork
RetroX will do its best effort to get the artwork for your games, but it can miss some, so in that case you can add the files yourself. Currently there are two methods to add artwork files, the Legacy and the Standalone method.
Legacy method
This is the method that RetroX has been using from the start and it is the method that some “RetroX ready ROM packs” that we have seen are using. For each game you add three files in the same folder:
cover.jpg : The box cover
shot.0.png : A screenshot from the game title screen
shot.1.png : A screenshot from in-game
If you have several games stored in one folder, just append the name of the artwork to each file. For example this is an Atari game with the artwork files added:
For games stored in their own folder (Amiga, DOS, others), just add the files in that folder. This example is a folder named “Turrican II” with all the files for the Turrican 2 game for Amiga.
This is a new method added in August 2019. Instead of mixing the artwork with the games, the artwork is stored in separate folders. This is the preferred method if you are using services like EmuMovies.
In your storage, where the “retrox” folder is created (See RetroX Collections), create the following folders:
retrox/artwork/images/box : The box cover
retrox/artwork/images/title : Title screenshot
retrox/artwork/images/snap : In-game screenshot
For each folder, create a folder for each system, again see RetroX Collections for the names. Example:
Then under each folder copy your images. Supported formats are png and jpg.
Note that Final Burn Alpha will look the artwork in the mame folder instead of fba.
Also note that MAME and FBA games will use the game code (mslug) instead of the game name (Metal Slug)
Videos
Video snaps are supported since August 2019 with some restrictions: They are only available in the Themes user interface, they are never downloaded automatically by RetroX and they must be added through local storage.
There are four locations that will be looked up for videos:
Again, the retrox folder is located in your RetroX Collection storage and system is the folder name as stated in that document.
Note that Final Burn Alpha will look the videos in the mame folder instead of fba.
Also note that MAME and FBA games will use the game code (mslug) instead of the game name (Metal Slug)
If you don’t have video snaps, we recommend you to look at EmuMovies. They provide artwork and videos for your games, just create an user account, install their Windows app and point it where you have your games stored, the app will download the artwork into the folder that you specify, then just move it to one of the folders described above.
Full example using the new method
Let’s think that we have Vigilante for PC Engine, Metal Slug for MAME and Shadow of the Beast for Amiga, you can put the files using this file structure:
retrox/artwork/images/box/amiga/Shadow of the Beast.jpg
retrox/artwork/images/box/mame/mslug.jpg
retrox/artwork/images/box/pcengine/Vigilante.jpg

retrox/artwork/images/title/amiga/Shadow of the Beast.png
retrox/artwork/images/title/mame/mslug.png
retrox/artwork/images/title/pcengine/Vigilante.png

retrox/artwork/images/snap/amiga/Shadow of the Beast.png
retrox/artwork/images/snap/mame/mslug.png
retrox/artwork/images/snap/pcengine/Vigilante.png

retrox/artwork/videos/amiga/Shadow of the Beast.mp4
retrox/artwork/videos/mame/mslug.mp4
retrox/artwork/videos/pcengine/Vigilante.mp4
ScummVM audio
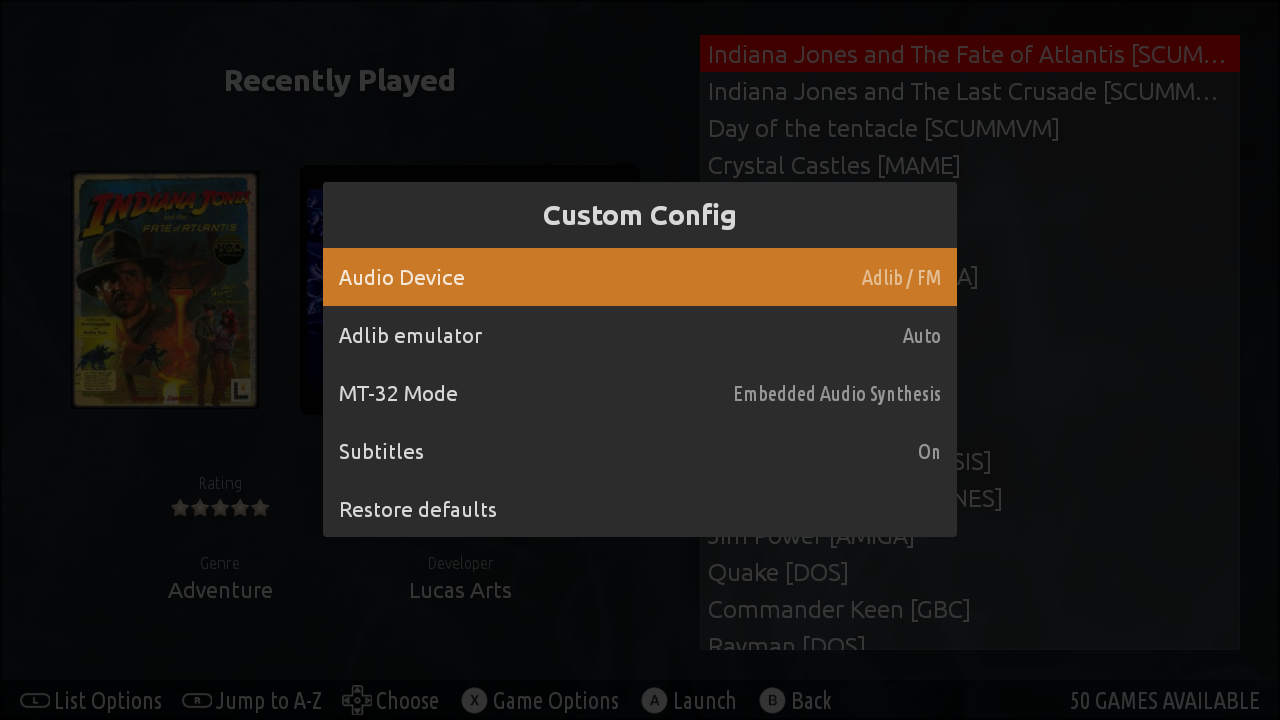
One cool thing about ScummVM is that the music is MIDI, so it can be reproduced in different types of audio hardware, and some games have special music for devices like the famous Roland MT-32.
There are four kind of devices that you can select with the emulator:
FluidSynth, a synthesizer with support of SoundFonts
MT-32 Emulation
All games will work fine with Adlib, which is the common audio system for PC. Some games sound just incredible with this device, even when it was the most basic one, so this is the default option. Also, for Adlib you can choose between two types of OPL emulation, the one from MAME (older) and the one from DOSBox (newer).
EAS sounds good but it may crash on some systems, if you select it and the emulator crashes, just choose another one.
FluidSynth sounds really great, although it will require a fast device. The emulator allows to select a soundfont, but for now we included the one recommended by the RetroArch guys (Roland SC-55).
MT-32 is the saint grial of MIDI audio for PC. It still one of the most looked after devices if you want to have great sound. Fortunately, for poor people like us, one can use emulation of this device just selecting this option… although again you need a fast device to enjoy it.
Themes for RetroX can be created from scratch, ported from Emulation Station or created by modifying existing RetroX themes. Currently RetroX themes are “inspired” on the layout of Emulation Station themes, but the engine has been built to allow new layouts in the future.
A theme for RetroX is made of three types of screens as follows
The theme will define how each of those screens will look, things like background, icons, text and more. If you have experience with HTML you will find similar concepts like styles, elements and such.
With this guide you will learn to create or modify your own themes for RetroX. You will need the following:
The easiest way to learn how write themes is to modify an existing one. For this tutorial we will use “Pure Dark” as a base, but you can use any other one available. You can find RetroX themes and resources here.
Download pure_dark.zip and uncompress it in your computer.
You will see that a RetroX theme is a collection of files like this:
systems : A folder containing images for each system
images : A folder containing images not tied to systems
fonts: A folder containing fonts
theme.xml : An XML file describing the theme
Systems folder
The systems folder contains artwork for each system, this is used in the system selector that is shown at start, and some resources are used in the game selection screen. For each folder you may find these files (jpg or png):
background.png : background used in the system selector screen for this system
icon.png : icon used in the system selector screen for this system and / or the game selection screen
logo.png : additional logo that can be used in the game selection screen
In systems you will find a lot of folders with the name of each system and three additional folders: all, favorites, recent and recommended. Those will contain the background and icons that will be used in the system selector for those categories.
Images folder
This folder contains images that will be used regardless the selected system. Here you will find background, stars for rating and any image that you may want to put somewhere
Fonts folder
Here you can put your .TTF files to use them later in your themes.xml file. May be other file formats work but only .TTF files have been tested.
Theme.xml
Here is where all the magic is done. The file for plain dark starts with the global theme definition like this:
version-format is “1” for now. In the future it may change to support new theme definitions
size is the target resolution for your theme. RetroX will automatically scale your theme to target other resolutions. For now we recommend you to stick to 720p
debug-images can be changed to “true” to make RetroX show a red rectangle where your image goes, it helps to find sizing problems when making the layout.
name is the name of your theme that will be shown in the RetroX Theme selection screen.
mode is the global mode for your theme, it can be dark or light (default). This will define the colors used in the dialog screens, progress information and more. You can change any of those colors, but defining light or dark is a good start. Pure Dark and Pure Light are good examples of each mode
What follows are definitions for: fonts, text styles, colors and screens.
Fonts
You don’t need to define fonts, RetroX includes it’s own definitions, but as you will learn here, they can be overriden
This will assign the name “sans” to the file found in fonts/opensans.ttf. Using this method will make it easy to change the fonts for each element without having to write the file name everywhere. Also RetroX comes with some predefined fonts: regular, bold, condensed and retrox. The first ones are variations of the Ubuntu font, and the “retrox” font is the one used in the RetroX logo.
As fonts are named, you can just assign a different font for an existing name like this:
That will make all elements using the regular font (Ubuntu) use your file “fonts/roboto.ttf” instead.
Text Styles
RetroX uses styles for all the elements: a title, a list element, the help at the bottom, etc. A style has a name and a definition of font name, font size and font color. This an extract from Pure Dark:
This code defines three styles: default, selector-title and game-desc. The font element uses the font name we described above (sans, regular), and as you can see, colors can be explicit like #C0FFFF or named like “text10” and “text_white_dim”. More on colors later.
RetroX has a lot of styles and colors predefined and you can add your ones or overwrite them. In this example, default is the text style used in many places, and it as overwritten with just one definition.
Colors
Again, color definitions are named as fonts and styles, let’s see what Pure Dark uses:
It has just one definition… because when we set “mode=dark” all the colors have been defined by RetroX, Pure Dark only changes the color used by by the text in the system selector.
Of course, we can override the defaults, for example we may change the color named text_white_dim with ours
This example, taken from the RetroX “dark” mode definition defines a highlight color than later is applied to other colors. Note that you don’t need to know the name of the colors, just use the defaults and only if needed, check the RetroX internal theme definition to look for the name of the color that you want to change.
(In construction…)
(It is supposed that this page is not published yet)
Some recommendations:
Try to use images not bigger than the size required, memory in Android is a scarce resource for apps and you don’t want to fill it up with big images. Try to use images with the size targeted to your theme resolution.
Try little changes when learning. A bad theme will be discarded by RetroX, if you made many changes you will not know which change broke your theme.